In this post, I will show you a simple way to track view_promotion and select_promotion events in WooCommerce using Goal Tracker for Google Analytics.
Tracking these events is often overlooked because it takes more effort, but trust me, it’s worth it.
Understanding view_promotion and select_promotion Events in Google Analytics
The Google Analytics ‘view_promotion’ and ‘select_promotion’ events help store owners understand customer engagement, particularly with promotional content on your website.
These events are part of Google Analytics E-commerce tracking and are used in the Monetization → Promotions report.
Imagine a scenario where a visitor lands on your site, notices a promotion banner, and clicks it. This is where ‘view_promotion’ and ‘select_promotion’ events come into play. They act as indicators that inform you whenever a visitor views or clicks a promotional item, like a banner or a special offer. This tracking is essential for gauging the effectiveness of your promotional strategies.
In the context of your WooCommerce store, understanding these events is crucial.
This information shows you what resonates with your audience and what doesn’t. Effectively tracking ‘view_promotion’ and ‘select_promotion’ events can help optimize your marketing campaigns and increase their effectiveness.
Event Structure
Like all other e-commerce related events in Google Analytics GA4, view_promotion and select_promotion have a set of parameters you should use.
Some of the following parameters are required, and others are optional.
But the main thing to understand is that this is your chance to add more information about your promotion and the items it promotes.
Don’t worry about remembering these now. Goal Tracker for Google Analytics will guide you through the parameters.
You can read more about these events here:
https://developers.google.com/analytics/devguides/collection/ga4/reference/events?client_type=gtag#select_promotion
Introduction to the Visibility and Click Tracking Features
Visibility tracking was the first feature we introduced in the Goal Tracker for Google Analytics plugin.
It’s similar to scroll depth but with one significant difference – Visibility Tracking will send out an event when an element becomes visible on the screen.
And that is perfect for tracking banners and promotions. Goal Tracker will send out an event only when the banner is in view (which is more accurate than sending it when someone opens the page).
Click Tracking triggers an event when someone clicks on an element, such as a banner.
Implementing Visibility Tracking for Promotions
Visibility Tracking can help us track the view_promotion event.
The way we use it is to specify the class or ID (CSS selector) of the promotion, which tells the plugin to fire an event every time this element comes into view.
In the following example, the hero section has a promo for the minimalist classic keyboard. We want to send out a view_promotion event whenever the CTA button becomes visible in the browser.
So, the first thing I’ll do is add a CSS class to this button. Later, I will use this class to create the event in visibility tracking.
btw, if you want to learn more about CSS selectors, you can read more about it here: Demystifying CSS Selectors: A Beginner’s Guide to Identifying Elements in Google Analytics Goal Tracker.
When you edit a block in WordPress, you can add a class in the “advanced” section:
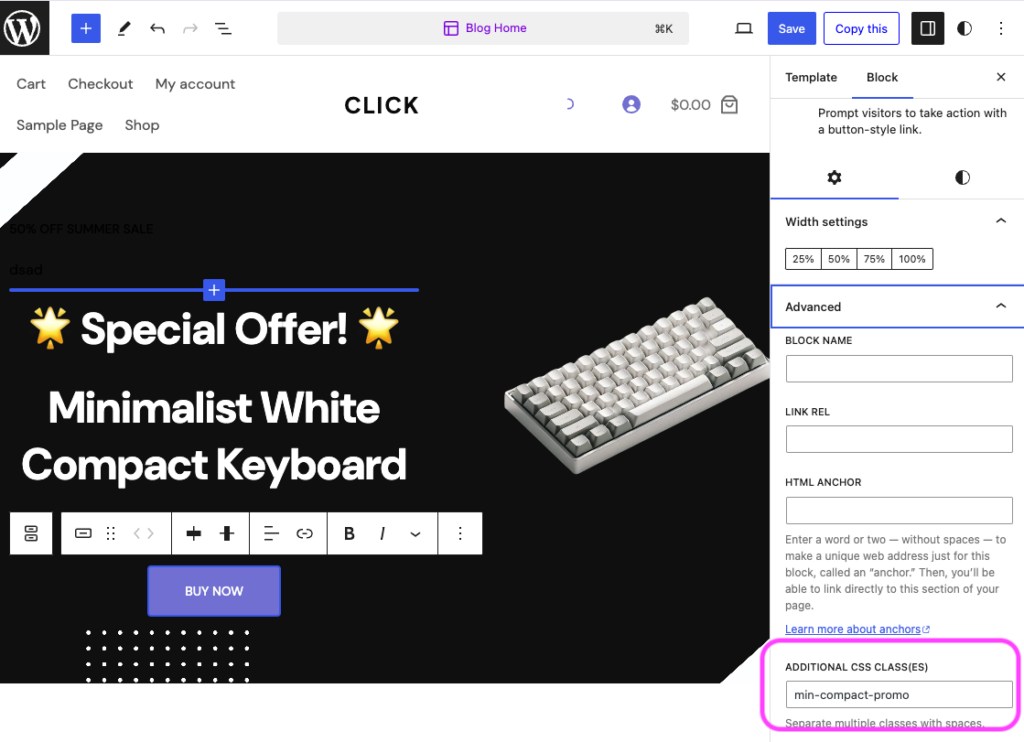
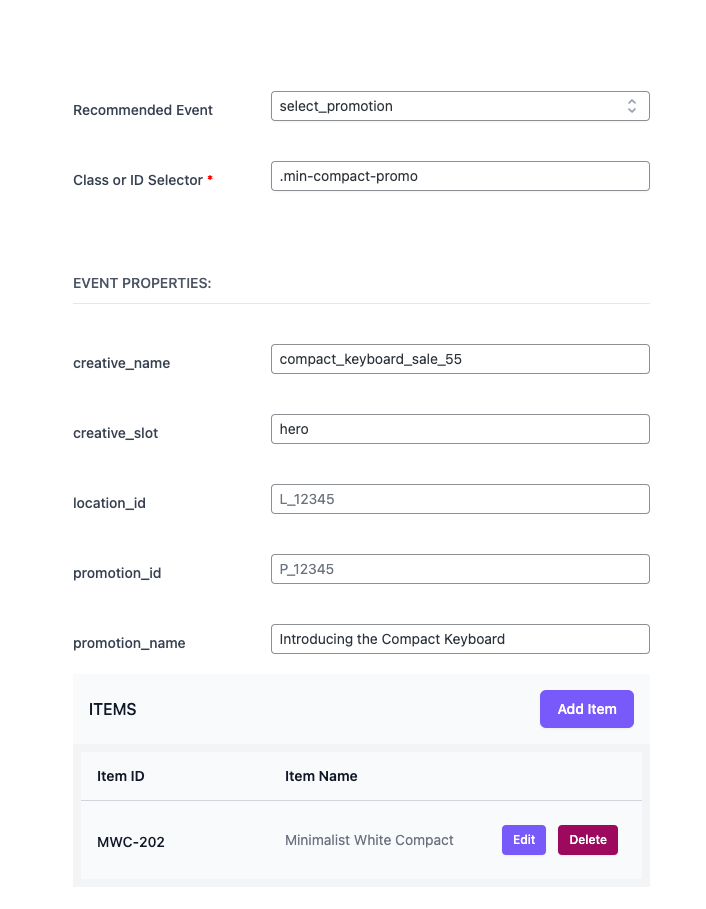
For this promotion, I added the class – min-compact-promo
Now that we have a class, we can create the visibility tracking event in Goal Tracker for Google Analytics.
Head over to the plugin’s Tracking tab and click Visibility Tracking.
Then, click Add Recommended Event, and select “view_promotion”.
Set the selector to the class we just assigned to the button .min-compact-promo, and make sure to keep the “.” in there. That is the way to note a class in CSS. If we used an ID instead, it would have been a “#” sign.
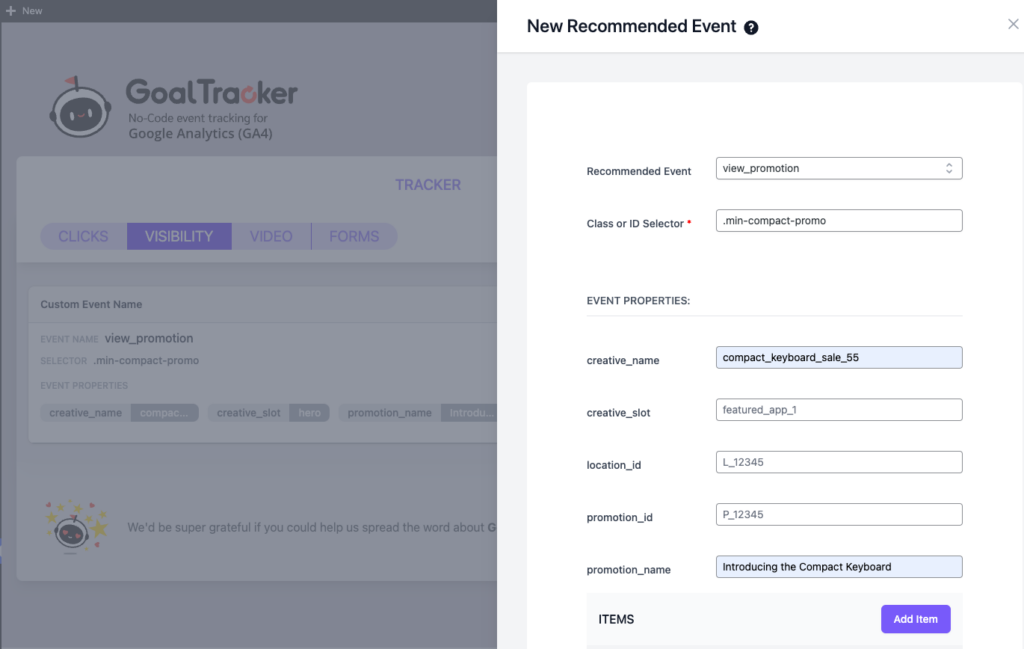
In my example, I set the creative name to “compact_keyboard_sale_55”, the creative slot to “hero”, and the promotion name to “Introducing the Compact Keyboard”.
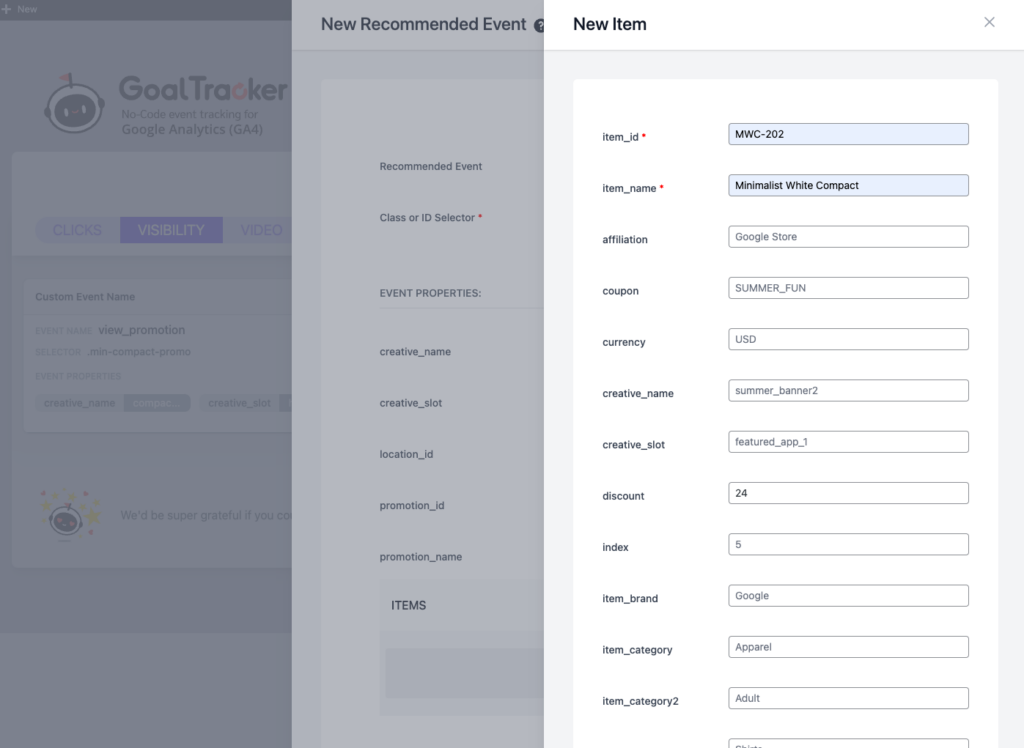
Then I added the item for this promotion (by clicking the Add Item button):
Once you save this event, the plugin will start tracking the views of this promotion.
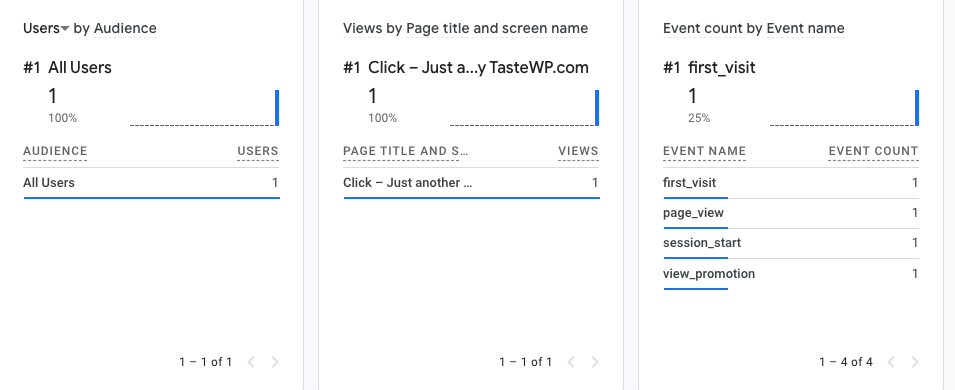
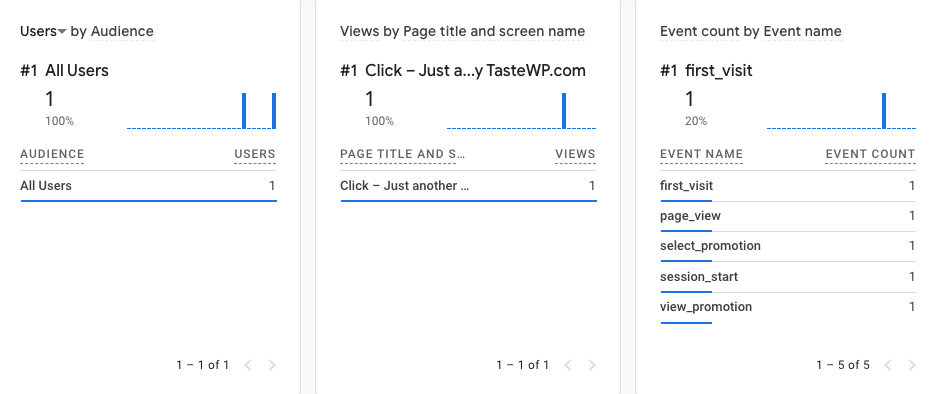
To test it, head to Google Analytics and open the Real Time report.
Then, open the page that shows the promotion and wait for the view_promotion event to show up under “event count”.
Implementing Click Tracking for Promotions
Tracking the “select_promotion” event is similar to how we tracked the view_promotion event, but instead of using visibility tracking, we are going to use the Click Tracking feature in Goal Tracker for Google Analytics.
In Goal Tracker for Google Analytics open the Clicks screen and add a new recommended event. Then set the recommended event to “select_promotion”.
We can use the same CSS selector, which in this case, is the button: .min-compact-promo
Everything else is exactly the same as we did in the visibility tracking section:
To test it, head to Google Analytics and open the Real-Time report.
Then, open the page that shows the promotion, click it, and wait for the select_promotion event to show up under “event count”.
Analyzing the Data from view_promotion and select_promotion Events
The first thing you should know about Google Analytics GA4 is that data takes time to show up in reports.
Sometimes it’s 24 hours, but it could take longer, which means that you will probably have to come back to this post tomorrow.
But in the meantime, you can use the Google Analytics demo account to learn how these events work:
To view promotion-related reports in Google Analytics, open the Promotions report under Reports → Monetization: Google Analytics Ecommerce Demo Account
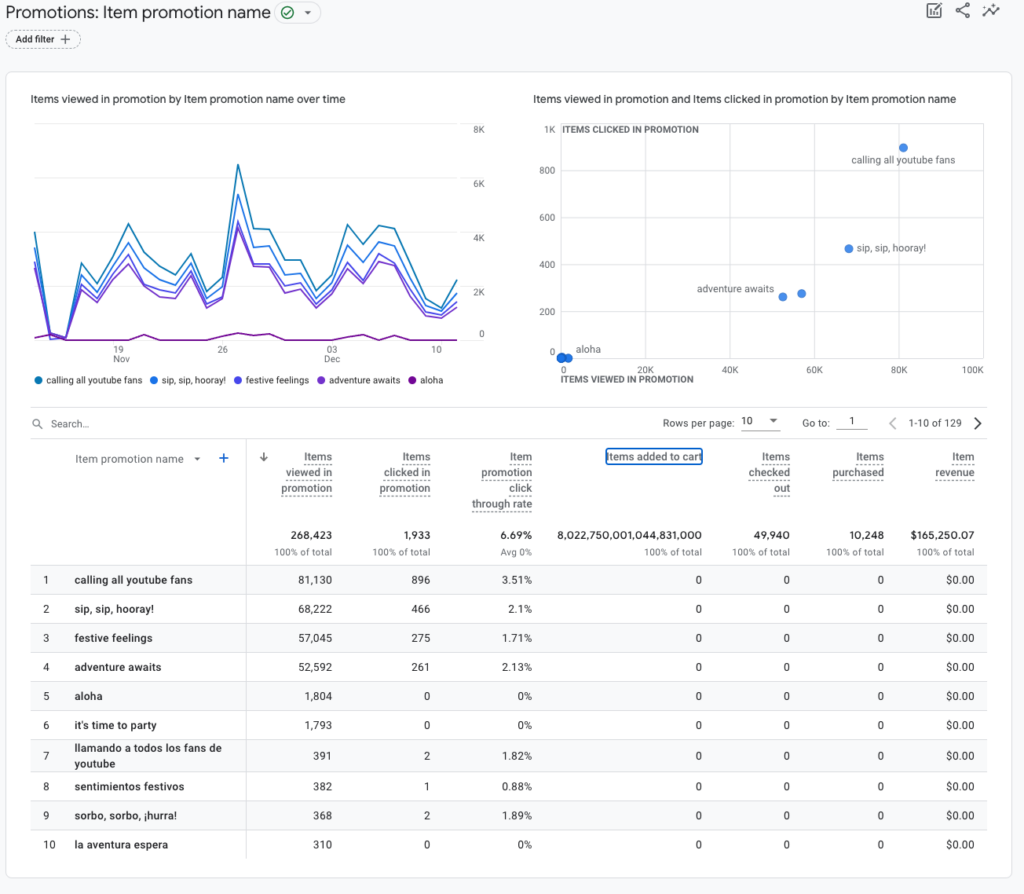
You will be able to learn:
- Which promotion is getting the most views.
- The click-through rate for each promotion.
- The conversion rate for each promotion.
- The purchase journey statistics.