Visibility tracking helps you to send events to Google Analytics when a visitor views a specific element on the page.
This could be a:
- Banner
- Pricing Table
- Call to Action Button
- Contact Form
- Page Footer
Basically, any element on the page.
For example, let’s say that you want to optimize the text on a CTA button.
You could just track clicks on this button, but what if only 10% of the traffic scrolled down to view this button?
Wouldn’t it be great if you could tell exactly how many visitors who viewed the button clicked it? Or better yet, understand that your first action should be to get more eyeballs to this CTA instead of focusing on the copy?
Tracking the visibility of an element #
Before you create the event tracking for your element, you will have to choose between two types of events in Google Analytics.
- Recommended Event → These are pre-defined events that Google recommends that you use if possible. They have an event name and a set of named parameters that represent metrics and dimensions.
- Custom Events → You choose the event name and parameters.

It’s up to you to choose which type makes sense for your use case, but I suggest reviewing the recommended events list first. Otherwise, create a Custom Event.
How to create Recommended or Custom Events
To learn more about how to create recommended or custom events, read the following knowledge base article: Creating Custom or Recommended Events
Example – Who viewed my Call to Action button? #
Let’s say that we want to track how many visitors viewed our CTA button on a landing page.
Our first step is to identify this button, and for that, we are going to give it a unique class:
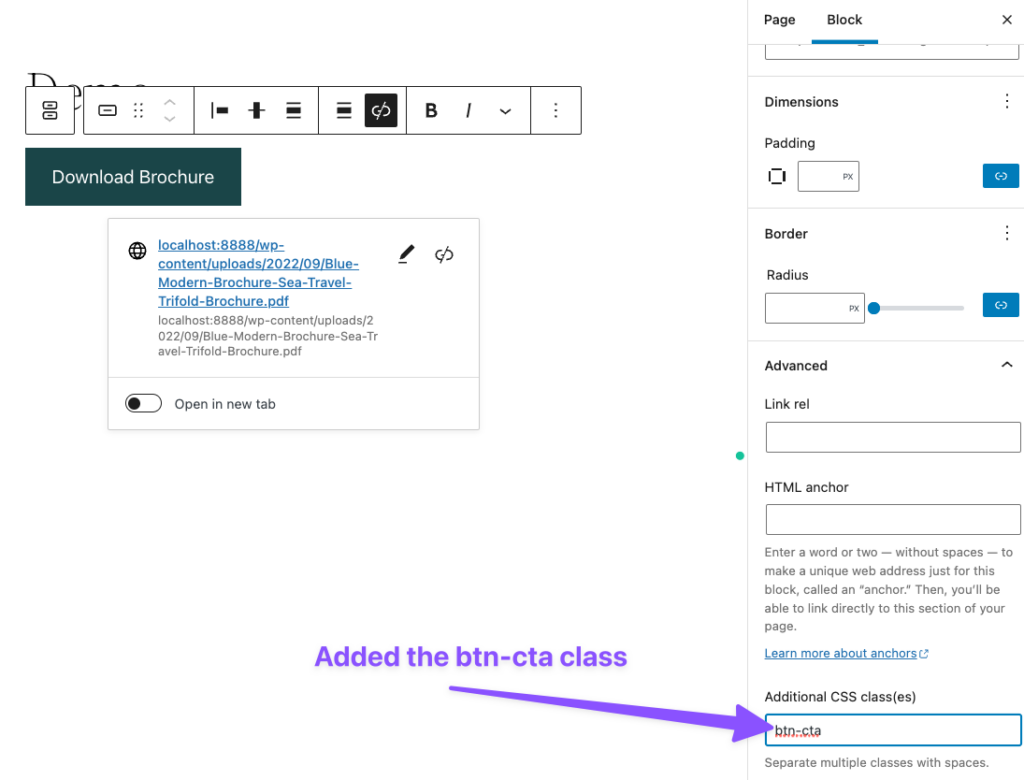
In the block editor, you can expand the Advanced section of the block to add CSS classes.
You can see that I added the class btn-cta. We are going to use this class when we create the event.
Once we save this button block, we can head to the plugin’s Visibility Tracking tab and create a new event.
Creating the event #
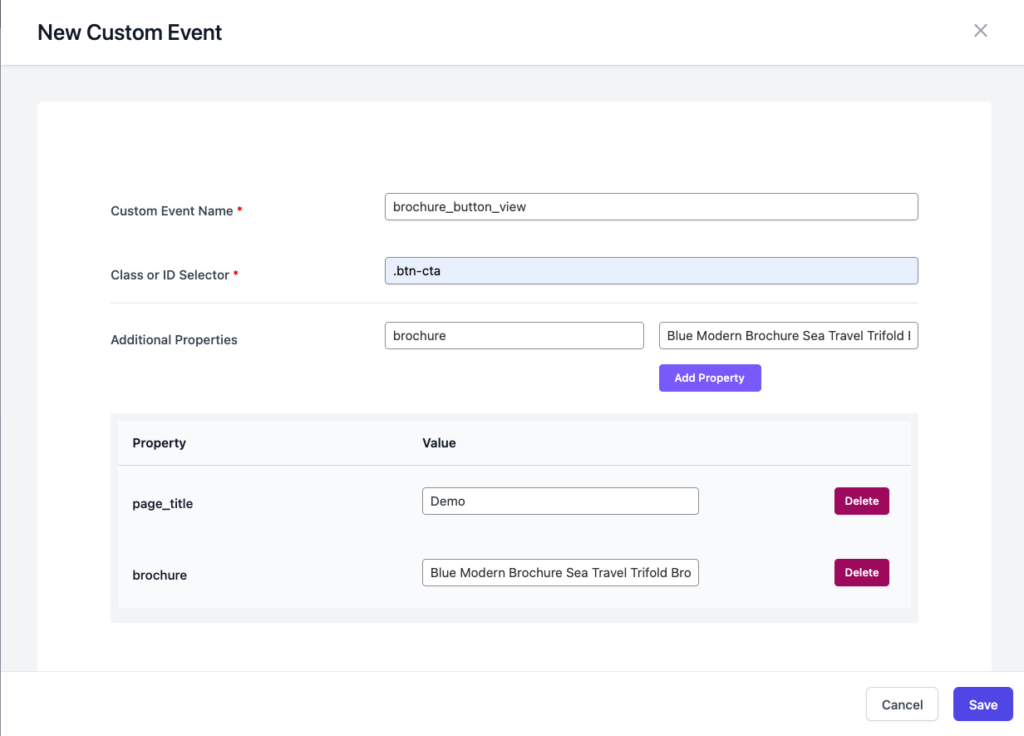
In the Visibility Tracking tab, click the Add Custom Event button (The recommended events list doesn’t have an event that suits this use case).
We can then fill in the event information:
Custom Event Name → brochure_button_view
Class or ID Selector → .btn-cta
Note the dot “.” character before the class name.
Then I added two additional properties:
page_title → Demo
brochure → Blue Modern Brochure Sea Travel Trifold Brochure
It should look like this:
That’s it. From that point, whenever a visitor views this button, the plugin will fire up an event and send it to Google Analytics.
Creating a new custom dimension in Google Analytics #
Now that we set up this event, there is one more thing to configure.
We used two parameters for this event:
- page_title
- brochure
page_title is a built-in dimension in Google Analytics GA4, but “brochure” isn’t.
If we want to be able to use this dimension in our reports, we will have to create it.
To create it, we will go to the Configure → Custom definitions page in Google Analytics and create a new custom dimension:
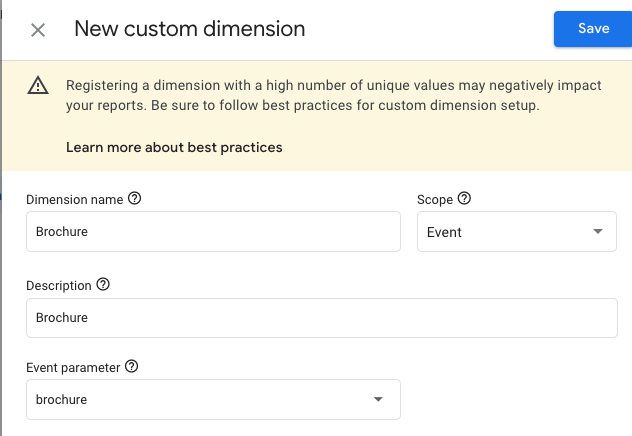
Ensure that the Scope is set to Event and that the Event Parameter matches the name of the property you added to the plugin.
Once you create the new dimension, you will be able to use it in your reports.


