Sometimes you want to measure how many of your users viewed certain sections of your page.
Part of the reason that we created this plugin was to track how many of the visitors scrolled down and viewed our pricing table.
This allowed us to understand the actual performance of our pricing table as opposed to the stats of the whole page.
Setting up scroll tracking
There are two steps for tracking scrolling:
- Create the goal in Plausible Analytics.
- Configure the Goal Tracker plugin to fire events when a visitor scrolls and views an element.
To create the goal in Plausible Analytics, please follow this guide: Adding Goals in Plausible Analytics.
Make sure to name it according to your use case.
Some examples:
- Pricing Table View
- Banner View
- Testimonials
Once you set the goal in Plausible Analytics, you can move on to the next step.
Add Scroll Tracking in Goal Tracker
To track elements on the page, we first need to identify them. Our plugin uses CSS (or Javascript) selectors to attach a listener to elements.
This means that we use HTML attributes like a “class” or an “id” of an element.
We also allow for advance selectors like: a[href~=’.pdf’]
But for now, let’s focus on classes and ids.
In WordPress blocks, most page builder plugins, or in pure HTML, there’s an option for adding a class to an element.
Here’s an example of a button:
I can click on the button in the page editor and edit the block settings. Expanding the “Advanced” section will allow me to add a class to this button.
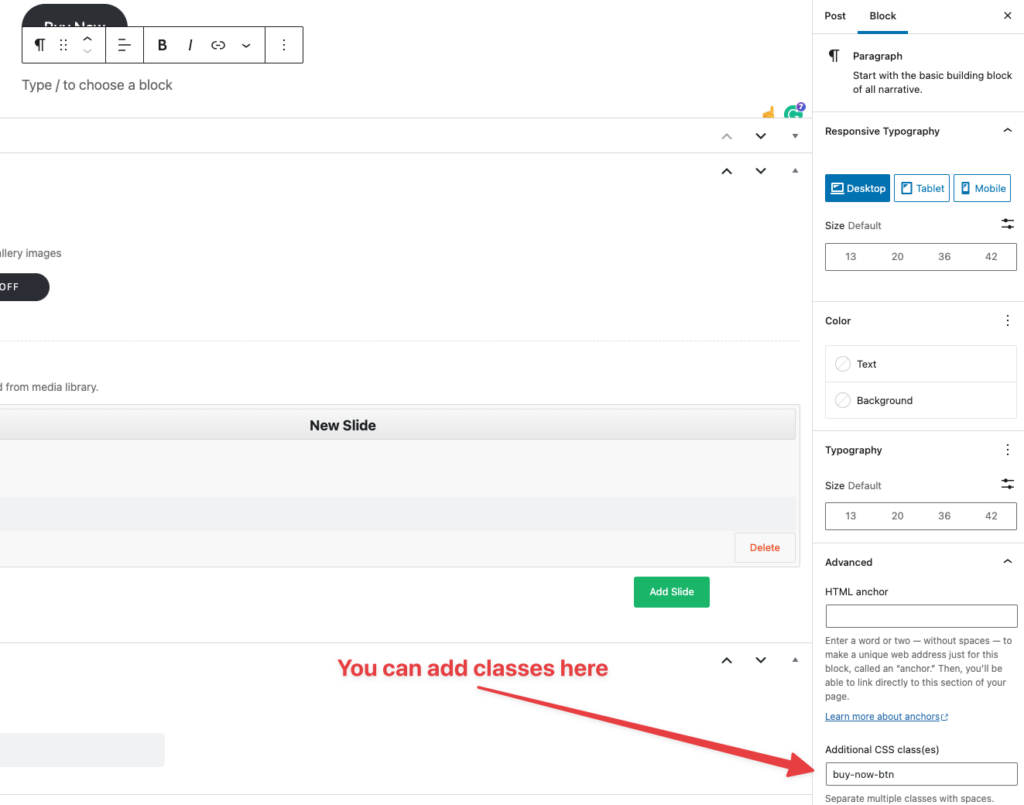
You can see that I added the “buy-now-btn” class.
Now that I can identify this button, I can head over to the Goal Tracker plugin, open the Scroll Tracking tab and create my first Goal.
Creating the goal
I created this scroll tracking goal for our button:
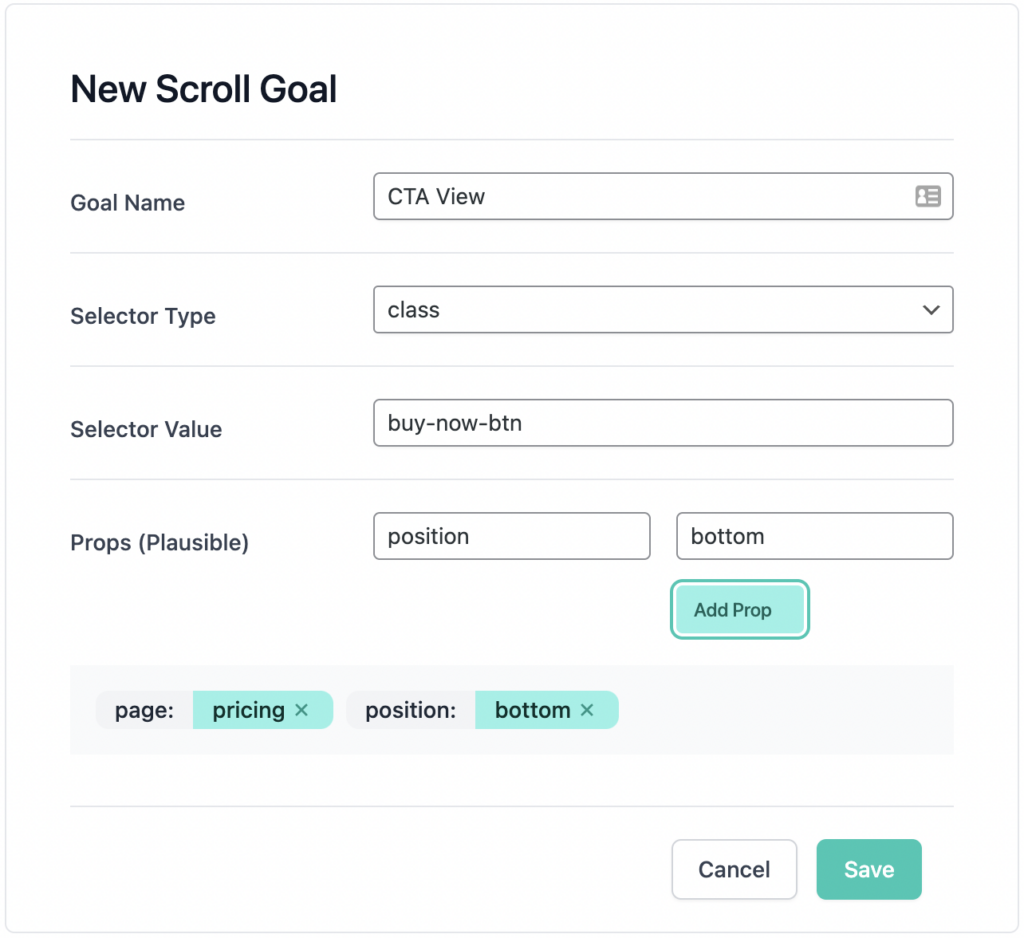
The Goal Name is “CTA View”. This should be the goal name that you created earlier in Plausible Analytics.
I’ve set the Selector Type to “class”, and in Selector Value, I put in the class that we gave the button – “buy-now-btn”.
And then there are the Props settings. This is where you can add more information about your goal.
Plausible Analytics allows you to add more metadata when tracking goals. These are Key-Value pairs that will enrich your goal data.
Later on, in the Plausible Analytics reports, you will then be able to perform breakdowns by these “props”
In this example, I added two “props” –
- page with the value front to help me identify the page where the user clicked the button.
- position with the value post to indicate the location of the button (in case I have more than one Buy Now button on the page).
Once you save the goal, the plugin will start listening to clicks on this button and send