GA4 completely changed how we work with events. For starters, everything in GA4 is an event, including page views.
In previous versions of Google Analytics, events were fairly simple in structure and contained four fields:
→ Category
→ Action
→ Label
→ Value
GA4 events are structured differently. An event has a Name and parameters.
GA4 Event Structure
event_name:
parameter_1 → value
parameter_2 → value
An example of such an event:
generate_lead event
generate_lead:
currency: USD
value: 99
To help reduce some complexity, Google created a list of pre-defined structured Recommended Events.
The idea is that you should try and use one of the recommended events before creating your own.
Goal Tracker for Google Analytics supports Recommended and Custom events and helps you navigate each.
Using Recommended Events #
Click on the Add Recommended Event button to open the new event form.
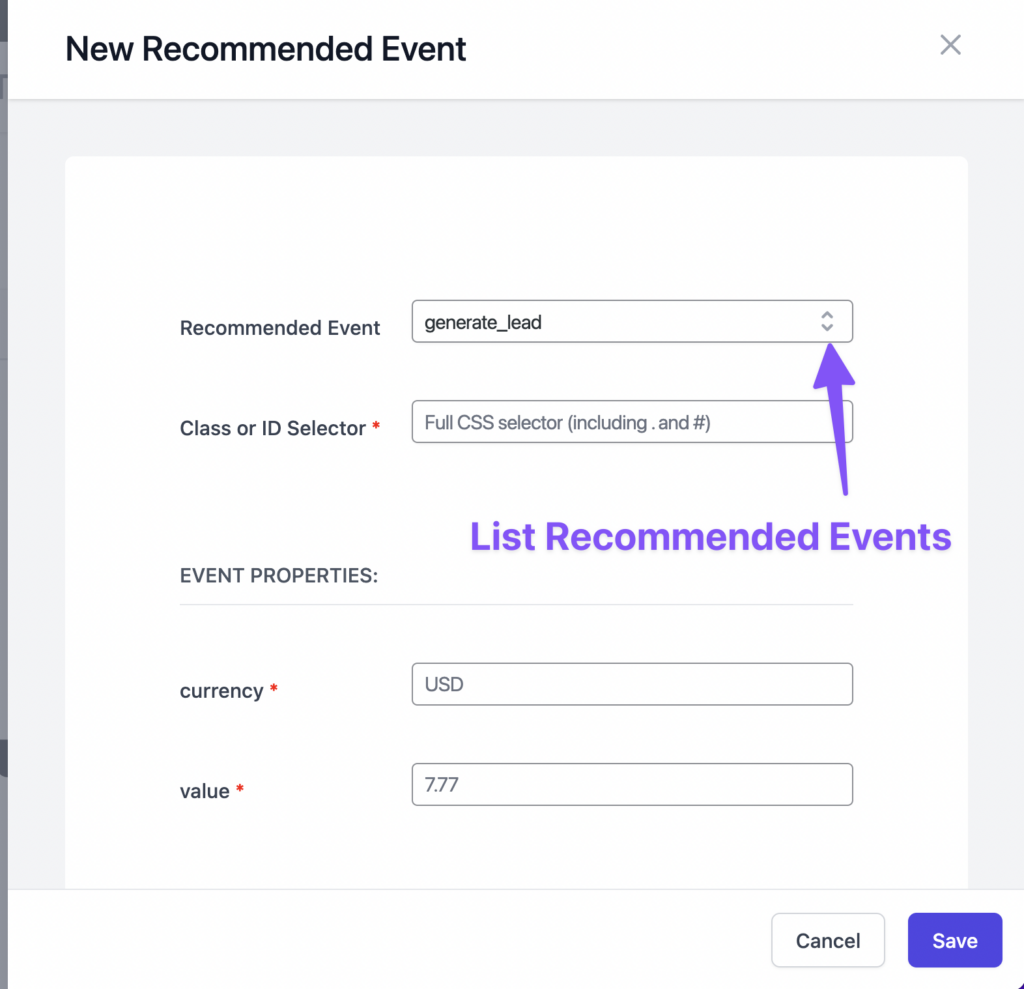
You can view or search the Recommended Event list and find the one that suits your use case.
Selector #
We use CSS-type selectors to bind events to elements and fire events.
For example, if you want to track a button with the HTML class “btn-primary”, you can type in .btn-primary in the Class or ID Selector.
When we want to specify a class name, we use the dot (.) character before the name, and for id attributes, we use the # sign.
I will show you an example later in this guide that will make it clearer.

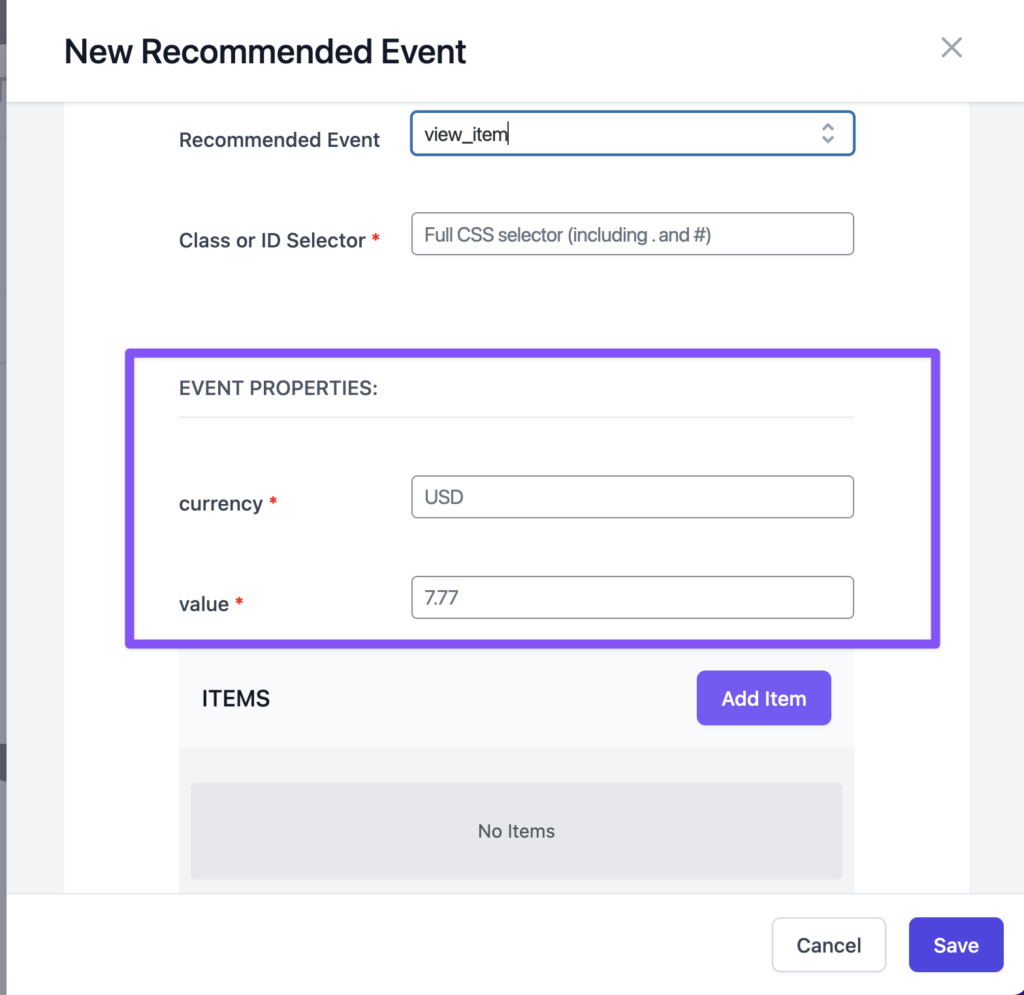
Event Properties #
In Google Analytics, events have properties that contain event data which can later be translated to metrics and dimensions.
A property has a key and a value.
Each recommended event comes with a set of pre-defined properties.
Some of the properties are required, and some are optional.
Items #
Some events also contain an items property which is in itself a list of sub-properties that represent items.
Items are usually optional but can include more information about an event.
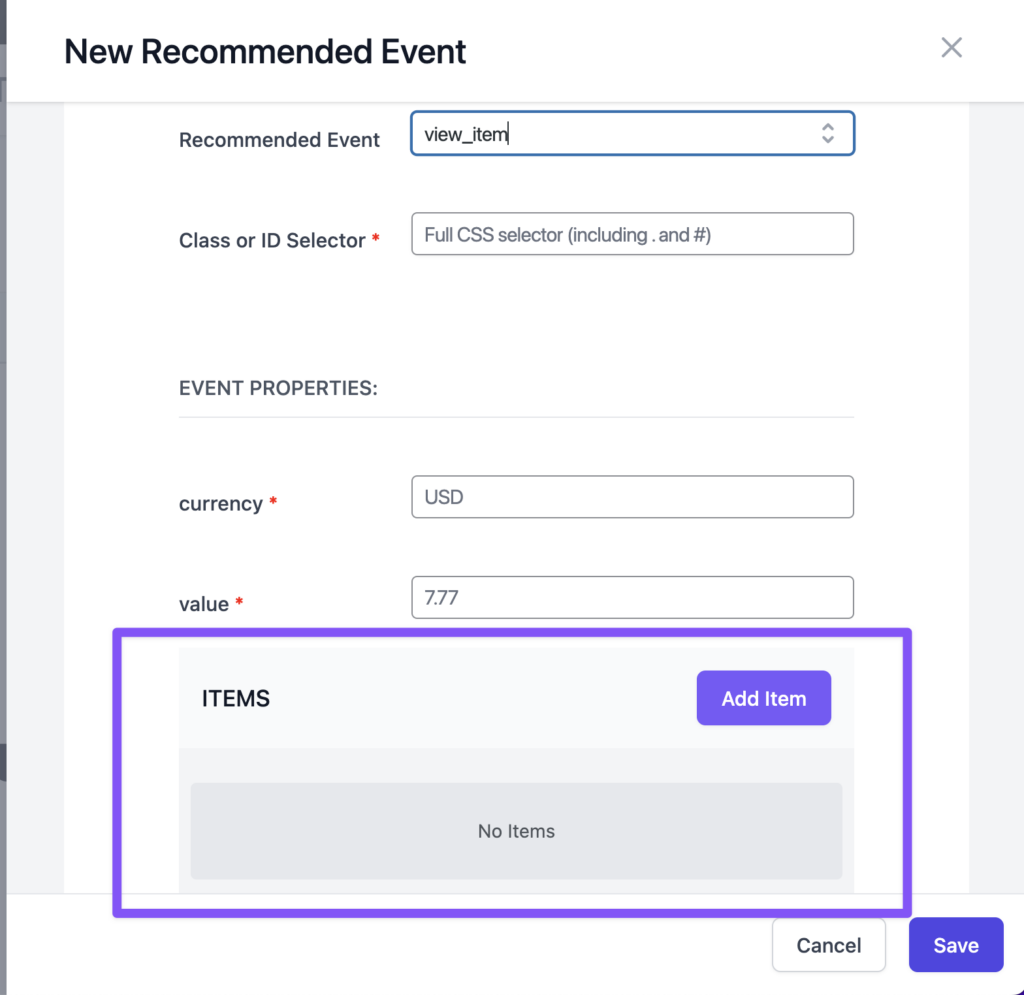
You can add items to the event by clicking the Add Item button.
As you can see, an item has its own set of properties.
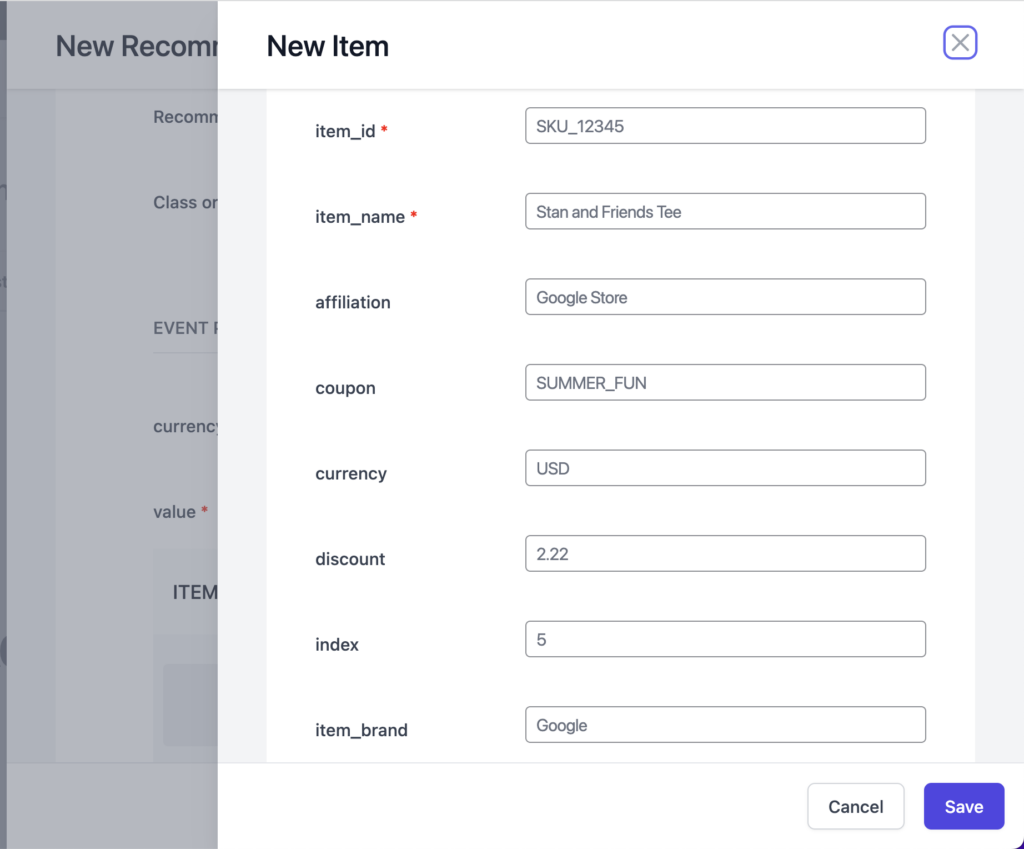
Once you are done, click save, and the plugin will start tracking this element for events.
Creating Custom Events #
Custom events allow you to create your own events with their own properties.
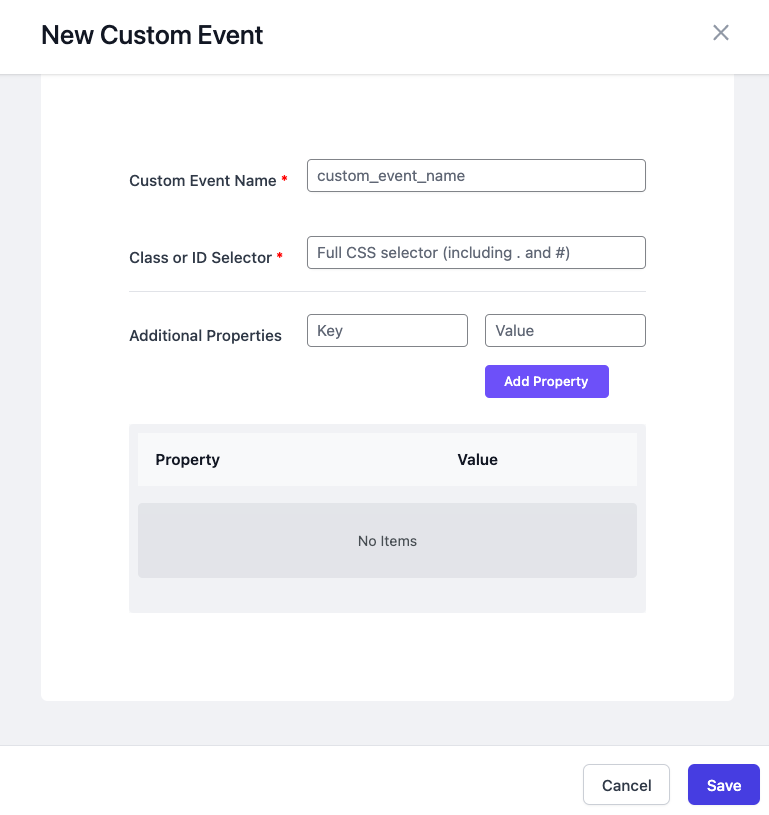
Custom Event Name #
This will be the event name in Google Analytics. It can contain up to 40 characters.
Class or ID Selector #
The same as with the Recommended Events. We use CSS type selectors for the tracked element.
Additional Properties #
These are key/valye pairs that can include more information about the interaction.
The key is going to be the name of the metric or dimension, and the value is the data.
When possible try using existing property names (metric and dimensions).
Here are a few examples to give you a better idea of how they can be used:
| PROPERTY NAME (KEY) | PROPERTY VALUE |
|---|---|
| video_name | Never Gonna Give You Up |
| link_url | https://www.youtube.com/watch?v=dQw4w9WgXcQ |
| value | 10 |
You can add up to 25 properties for each event.
If you used new metrics or dimensions, please make sure to read the next section.
Creating Custom Metrics and Dimensions #
When you want to use your own dimensions and metrics in Google Analytics, you have to configure them as such before they become available in reports.
To create new Metrics or Dimensions, open Google Analytics and head over to the Configure → Custom Definitions page:
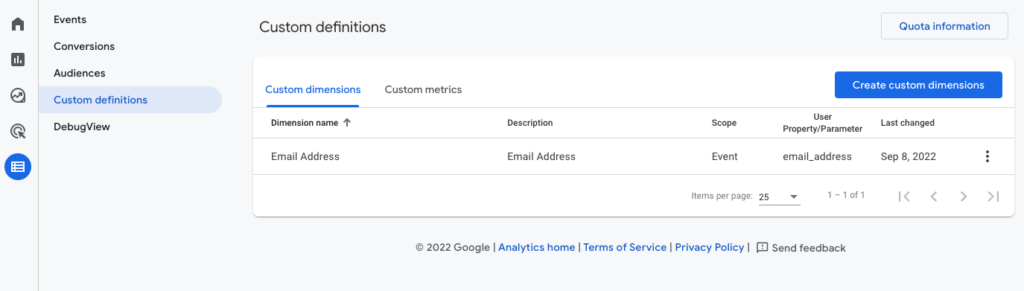
Click on the “Create Custom Dimension” or “Create Custom Metrics” buttons to create your custom settings.
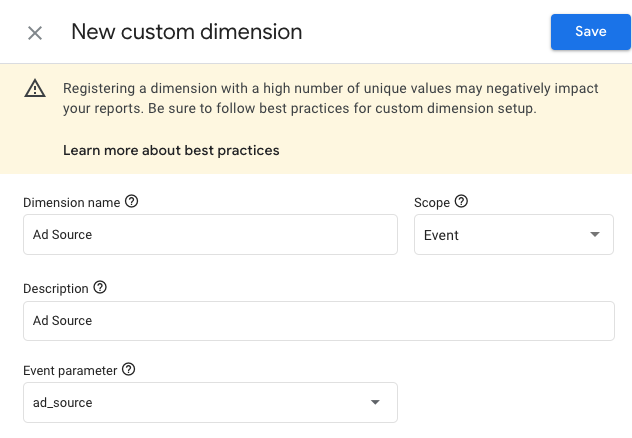
For example, if we are tracking ads and want to use the dimension ad_source, use the following settings:
Custom Dimension
Dimension Name → Ad Source
Scope → Event
Description → Ad Source
Event Parameter → ad_source
Here is how it should look: